Showing posts with label paint. Show all posts

Shut The Front Door

Friday, July 22, 2016

We loved our house because it was unique for our area and had so much light and so many windows, it was great. But it definitely lacked curb appeal, and what does one change when you want to up the curb appeal? Besides landscaping, a huge change you can make to any home is the front door, it's actually one of the highest ROI you can make during a renovation or just as an update. We initially ordered a gorgeous front door, that sadly didn't fit, so we were stuck with our oddly sized clunky door.  

(Before we moved in)

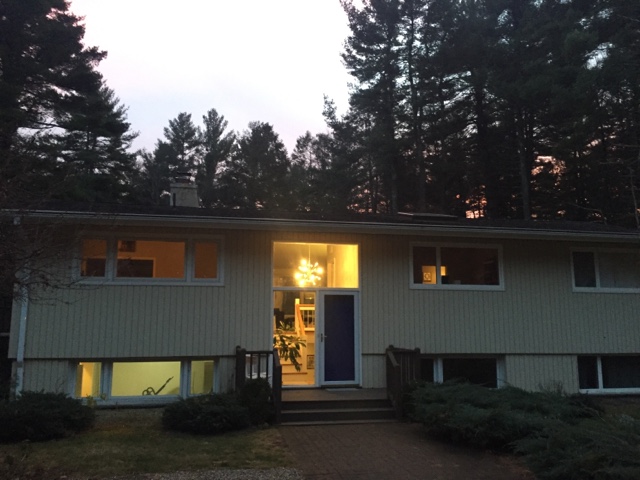
In a rush to get ready for our Christmas party, we made a very rash decision and painted the door a royal/navy colors that just wasn't right. Once the weather got a little warmer and we would be okay with just a front storm door, we got to work on fixing the door up!

Time to break out the belt sander! Always use safety glasses and if you can something to protect your ears (you'll miss your hearing when you're older).


Ready to rock & roll!

One side was pretty easy, only a coat of white paint.


The exterior side of the door, proved much more challenging. This project turned into a major event, with 8 or 9 layers and 40 years of paint to peel off. 


Just keep sanding.. Just keep sanding. 


Once it felt smooth it was time to prime!

After letting it dry for a few hours we got to work on the paint. It was two coats each side, and letting it dry over night in between.  

We picked Benjamin Moore's Beach Glass, and we really love the color, it gives a little more life to the exterior, and goes a lot better than the royal blue. 


It goes well nicely on the inside too, the walls are Moonshine (one of our go to colors).


#TBT File Cabinets Can Be Cute Too

Thursday, July 30, 2015

I was digging through photos and posts of projects past and came across this gem we never got around to finishing/posting.. so here it is for your Throwback Thursday enjoyment!

We started quite a few side projects while waiting to close on our new place and this is one I can't wait to see finished. We found some super inexpensive filing cabinets at Staples and started by painting them white, instant improvement. Then I went to Michael's and picked out a very cool stencil set - Thanks Martha :) and a pretty acrylic shimmer paint color.

DIYer Beware: This was not as easy as I expected and took MUCH more time. The stencil wasn't large enough so after rolling the paint on, I had to wait for it to dry then set it up in the next position, tape it down, etc. I probably should have just measured the drawer faces and ordered or made a stencil to fit - but coulda, woulda, shoulda.


 Love a little shimmer!

 We're getting somewhere..

Ta da! Now just a little white paint touch up. 


Hope you enjoyed the blast from the past - We'll make sure to share the finished project and office photos soon!

<3A

Before & After: The Guest Bathroom

Monday, March 10, 2014

Everyone loves a good before and after story, and looking at the pictures of how far our guest bathroom has come, we're pretty proud!
It was a lot work, and a lot of fun to create this 'after' and we're really happy with the way our guest bathroom turned out (one down, one and a half to go). We wanted to share all the projects that went into it and some the changes along the way!

PROJECTS:
New Vanity

Old vanity gone, new vanity in!

All that was left was the frame, mirror and wall caddy!


Major Mirror

Wednesday, March 5, 2014

My mom, the amazing real estate agent, recently had a client buy a phenomenal property, and lucky for us the previous owners left behind a little something. Actually it was a big something, a five and a half foot tall, massive bronze framed mirror. The new owners had no need for the mirror so they decided to give it to us - for free (score)! After the nightmare of transporting this giant mirror in the midst of a polar vortex (if you haven't heard it's been a heck of a winter) we finally got it home. Bronze isn't really our style so we new we'd have to do a little tweaking.

We taped off the monster mirror with painters tape and plastic. 

Bye bye bronze. 

We picked up some Rust-oleum Titanium Silver paint, we figured the lighter color would still show the detail, and metallics always look fancier :) 


It took a large wood bracket and four serious toggle bolts but we managed to get it on the wall!

It feels like we doubled the size of our dining room, seriously - mirrors for everyone!!


Sick Day DIY: His & Hers Throw Pillows

Tuesday, January 28, 2014


It's that time of year again, everyone and their mom is getting sick, including us (boo). We're not very good at the whole sick in bed thing, so if we are stuck on the couch, you can bet we're still up to something! After the fever broke and the cough let up a bit we got to work on some throw pillows I've been wanting to get done for our bedroom. Hope you like them as much as we do!


We started with two 20x20 pillow inserts from Michaels Crafts but you can buy some here too.

Also from Michaels was the fabric paint (the blue color was just in case the metallic didn't work) and brushes. 

I actually had a pretty difficult time finding simple plain white pillow covers so I ordered these ones this Etsy store.

Next we cut some cardboard to fit the pillow. 

Then we wrestled the cardboard under the pillow cover. 

Next we lightly traced a general writing outline with a pencil. 

Then it was painting time! I did three coats of paint, the bottle only says two but I wanted to be sure the metallic paint was still readable. 


And there you have it!
 Now go out and make some fabulous throw pillows of your own and tell us all about it!

PS.. Our bed was a total steal you can find it here >> Our Bed


Furniture Makeover: The Bar

Thursday, October 31, 2013

When it came time to move we started planning what furniture we would keep and what we would toss, since we would be merging all of our things. One of the pieces we knew we didn't want to get rid of was an old, and rather large, china hutch Joe has had for ages. So we decided with a little imagination it would our new bar! Every house needs a good bar, right?
While a few finishing touches are needed we just couldn't wait to share how excited we are about it.
First of all, sorry about this picture, I didn't realize until I sat down to put this together that I had forgotten in the chaos of the move to take a before picture. I did find it in the background of a picture taken during the making of our Wine Cork Table (link) so voila!


First we took apart the whole unit and removed the doors, then it was time to sand.

and sand some more.


Once we had taken off the doors on the top portion of the bar we removed the chicken wire looking front.

After all the sanding was done it took 6 cans of BIN to prime both the top and bottom portions of the bar. After priming I used my beloved paint sprayer and some high gloss white paint to finish it off.

Initially when we start this makeover we planned on picking new hardware, but plans changed when we realized there is no longer hardware made that would fit the existing holes on the drawers and doors. We didn't want to put more wholes in or ruin the existing look and lines of such a cool piece of furniture so I thought I'd try using some left over chrome spray paint and see what it looked like.

Because of the amazing detail in all the pulls and handles the chrome turned out to be a perfect option, we both actually gasped as we painted it, because it looked THAT much better.

Pretty amazing.

Another.. because I'm obsessed.


Once everything had dried we started moving it in, and putting it back together.

We decided to mount the top portion instead of stacking it like it was before so we would have a space to make drinks on.
After securing the top to the wall we glued mirror panels to the outter sections. 

Next, we bought some inexpensive corbels at home depot and painted them to match, 
we wanted to go for a custom wall unit look instead of two separate pieces.

In this picture from our Bar Serving Tray Project post you can see one of the corbels after it was hung, we left just enough space to make delicious cocktails :)


We're still finishing up the doors but in the mean time, why not start stocking! 
(PS Totally in love with the 'BAR' sign - post coming soon!)