Showing posts with label decor. Show all posts

The New Thirty Seven

Wednesday, January 13, 2016

Hi All! Sorry for a little lag in posts - the move, bathroom renovations, and holidays were a bit hectic, but we're settling in finally. One project that has been long over due were the new house numbers we made for the garage. Our garage is detached, I think Joe loves it so much because it's his own man cave now, but anyway its the first thing you see when you pull up to the house and curb appeal is important! The existing ones were fine but since our house is a 1950s split and we're going for the Mid-Century vibe I thought some modern looking numbers would be nice. And it wouldn't be our project if a little reclaimed wood wasn't involved.

This is the sad before picture.


A little sand paper, water proofing sealer and stain was all we needed to prep the board.

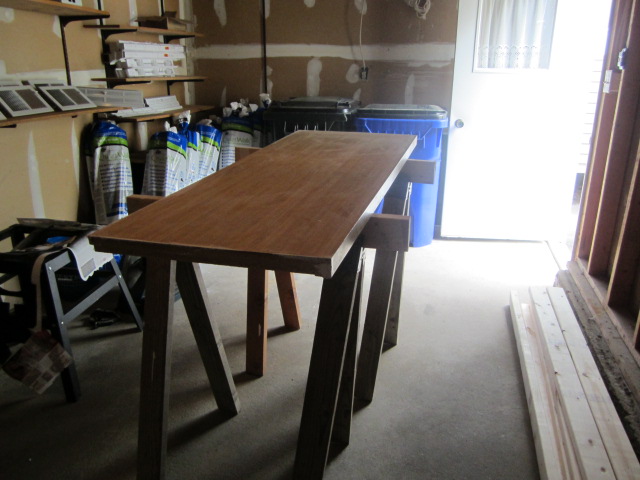
First, we sand.. and sand.. and sand.


Then using a rag a light coat of stain went on, and we let it dry for 24 hours. Once the stain had dried we did two coats the spray sealant, with the instructed drying times in between!

Using the template to decide on the number placement and mark the spots to drill.

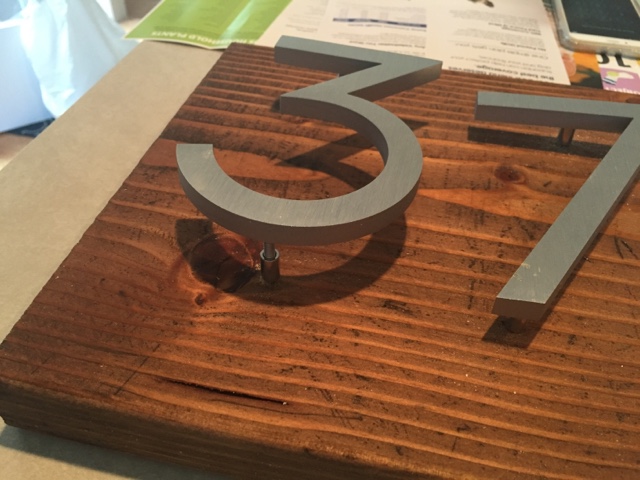
The numbers came with instructions for the exact hole size to drill into the board. Then we simply tapped them snuggly into place. *If for some reason they seem loose to you, a little silicone can be added to the inserted end and will keep the numbers attached.


I snapped this picture the first time I saw the numbers, Joe hung them while I was working late, and it was a wonderful surprise. (He used four carriage bolts that actually went through the wall and we're fastened on the other side - those numbers aren't going anywhere.)


Some Light Updating

Tuesday, December 15, 2015

Since the first day we walked into our new house we could't wait to take down the seriously outdated fixture that hung in the foyer. The light is the first thing you see as you walk up to the house so we knew it had to be good! Something that made a statement but wasn't so crazy we would hate it in a week. Then when shopping on our new favorite website All Modern, we found it... the Supernova Light. Installation was pretty easy and it makes a huge impact.

Bye bye light.


Hello Gorgeous.


Here we go.. Again!

Tuesday, November 3, 2015

We feel pretty terrible for our absence in updates but some pretty exciting things have happened over the past few months. Not wanting to jinx a closing we didn't share until now that we bought a new house! A whole new project! It's near the condo we love so much, which is now being rented out by lovely tenants, and we're ready to get to work. These are some of the before photos! 


#TBT File Cabinets Can Be Cute Too

Thursday, July 30, 2015

I was digging through photos and posts of projects past and came across this gem we never got around to finishing/posting.. so here it is for your Throwback Thursday enjoyment!

We started quite a few side projects while waiting to close on our new place and this is one I can't wait to see finished. We found some super inexpensive filing cabinets at Staples and started by painting them white, instant improvement. Then I went to Michael's and picked out a very cool stencil set - Thanks Martha :) and a pretty acrylic shimmer paint color.

DIYer Beware: This was not as easy as I expected and took MUCH more time. The stencil wasn't large enough so after rolling the paint on, I had to wait for it to dry then set it up in the next position, tape it down, etc. I probably should have just measured the drawer faces and ordered or made a stencil to fit - but coulda, woulda, shoulda.


 Love a little shimmer!

 We're getting somewhere..

Ta da! Now just a little white paint touch up. 


Hope you enjoyed the blast from the past - We'll make sure to share the finished project and office photos soon!

<3A

The Laundry Room Folding Table

Monday, July 27, 2015

When we first bought our house and started gutting the kitchen, we decided we wanted to save as much of what we took out as possible. Most of the cabinets got a new home in the garage (link coming) but this small awkward desk area became a problem. What could we possibly do with it? At the time we were shopping around for our kitchen counter tops and I remember thinking, wouldn't it be nice if the yucky plastic desk could look like pretty stone, I immediately started researching. It turns out there is a spray you can buy that will create a stone affect and with that this project was born. 

This is after we went all hulk and ripped the counter top off the base to start painting. 

The side cabinets went to the paint work shop to get a fresh coat of white high gloss paint, with our AMAZING paint sprayer.

The counter top went out to the garage to get scuffed up a bit and prepped for painting.

We actually used two different spray paints and layered them to give the stone a pretty gray color. One was called Gray Stone and the other was Granite Stone.

We kept spraying in even strokes until you couldn't see the tan surface through the stone anymore. Then we let it dry for a few days. After it was totally dry and ready to epoxy we picked up a kit called Super Glaze, at Home Depot and got to work  - sorry we don't have any photos of this step but we followed the directions exactly as the product entails and we love the results.


 On to the next project!
A&J


The Super Hero Shelf

Monday, March 23, 2015

We started our basement organizing project with the greatest of intentions, honestly. But it's hard to not get a little distracted and nastaligic looking at the things that made childhood great. Joe decided that some of his favorite things shouldn't be packed away, they should be on display!

Choosing the height for optimum viewing. 

We bought the same plumbers pipe we used for the living room shelf, these are half inch pipes. Then we spray painted them black. 

Next up we used the stud finder and level to mark where the pipes should go.


Once we found the stud, we screwed the flange into the wall. 

Then twisted in the pipes. (Why so serious?)

Once the pipes were in place we put the boards on top and Viola!

Joe couldn't wait to start placing his collection!


Until next time! 

Best,
Amanda & Joe


Super Simple Holiday Centerpieces

Friday, December 26, 2014

For the holidays we love having decorating and hosting friends and family. This year we were hosting Christmas Eve dinner for the second year and wanted the table to look just as pretty as the tree. Flowers are always nice but they don't last terrible long so we went with what we had hanging around the house. 

All it took was a few branches cut off our Christmas tree, some mason jars, white votives, cranberries and water and we had a centerpiece we can keep through the winter. 

First we taped the jars to some target serving trays to avoid 

Then we cut some pieces from the branches and placed them around the mason jars. All that's left is water, cranberries and votives!


The final result! Festive and simple centerpieces we're going to keep all winter long! :)


Thanksgiving Favorites

Monday, November 10, 2014

The holiday season is upon us! Get togethers with family and friends means decorating and meal planning, all great excuses to shop for new holiday accessories. What's not to love about this time of year? We wanted to share a few of our picks to add a little something special to your home or table, these are our Thanksgiving favorites!