Showing posts with label makeover. Show all posts

Master Bathroom Update: Lighting

Friday, August 26, 2016

The master bathroom has come such a long way since we moved in, and so much has changed. I think we can all agree lighting is crucial in any room, especially the bathroom, so we wanted to create different lighting options and not just one fixed on/off setting. 

Just a little throw back to what our bathroom used to be.

Once we opened up the soffit we saw an opportunity to use part of what was there. To create a little less destruction, we moved the lights from the bottom and secured them to the board that was previously the top of the soffit. We also patched the wall where the 'Hollywood' light had been but kept the wires and put them into a new junction box. 

Then we took a board and traced out the three lights that we had moved upward. 


Once we were sure that would fit, we took the board out to stain it. We stained the bottom board the same color as a piece of reclaimed barn wood we had in the garage (because doesn't everyone have a stash of reclaimed barn wood?). 

Once all the boards were dry, we secured the underneath panel over the lights, with a nail gun. Then secured the reclaimed barn wood to the front, with wood screws and the impact driver, to act as a panel. It's covering the wires up top, and giving the appearance of a wood beam.

It actually came out a lot better than we imagined, it's up high enough now the room feels much taller, and the reclaimed wood warms up an otherwise gray, cool feeling space. 

Much better!

The lights in the soffit really help to brighten the space as well, great for beauty time.


We do need to replace the light in the shower, but for the time being, it works!

After our first shipment arrived damaged and had to be returned, we waited THREE MONTHS for this awesome mirror - totally worth the wait. Its a touch LED mirror with a blue setting (we found out it actually acts as a black light) and a white setting that you can see set into the mirror. The lights can be on individually or together. It looks very over budget - but surprisingly wasn't!


Shut The Front Door

Friday, July 22, 2016

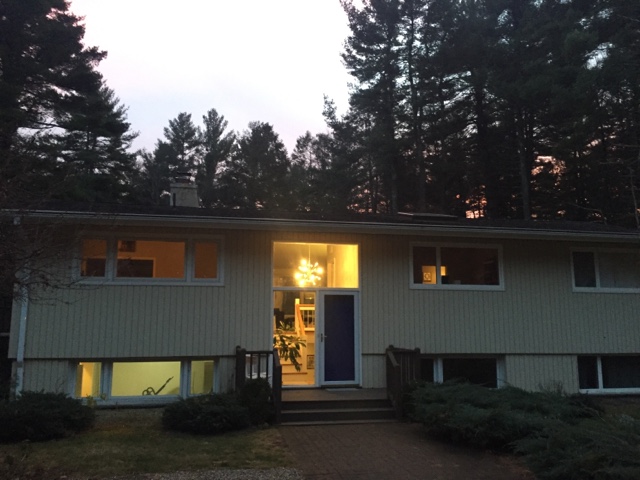
We loved our house because it was unique for our area and had so much light and so many windows, it was great. But it definitely lacked curb appeal, and what does one change when you want to up the curb appeal? Besides landscaping, a huge change you can make to any home is the front door, it's actually one of the highest ROI you can make during a renovation or just as an update. We initially ordered a gorgeous front door, that sadly didn't fit, so we were stuck with our oddly sized clunky door.  

(Before we moved in)

In a rush to get ready for our Christmas party, we made a very rash decision and painted the door a royal/navy colors that just wasn't right. Once the weather got a little warmer and we would be okay with just a front storm door, we got to work on fixing the door up!

Time to break out the belt sander! Always use safety glasses and if you can something to protect your ears (you'll miss your hearing when you're older).


Ready to rock & roll!

One side was pretty easy, only a coat of white paint.


The exterior side of the door, proved much more challenging. This project turned into a major event, with 8 or 9 layers and 40 years of paint to peel off. 


Just keep sanding.. Just keep sanding. 


Once it felt smooth it was time to prime!

After letting it dry for a few hours we got to work on the paint. It was two coats each side, and letting it dry over night in between.  

We picked Benjamin Moore's Beach Glass, and we really love the color, it gives a little more life to the exterior, and goes a lot better than the royal blue. 


It goes well nicely on the inside too, the walls are Moonshine (one of our go to colors).


Outdoor Projects Continue: Stairs

Tuesday, June 28, 2016

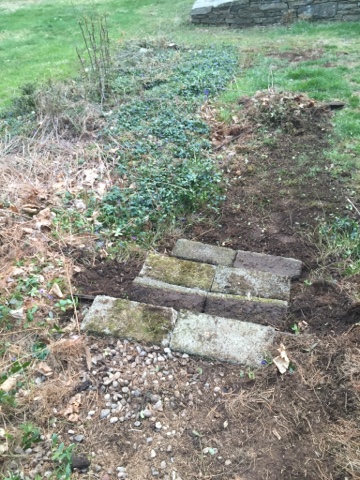
With the warm weather has come A LOT of weeding. While we were attempting to get out some of the over grown areas off the back patio we came across a old, rotten stairs, winding around a large rock toward the side of the house. It felt very Secret Garden, and we decided it needed a little help. 


With a lot of raking, weeding and will power, everything finally came out.

We leveled the surface for each step and used extra blocks lying around the property to create the stairs.

The make things look a little more clean, and hopefully help with any weed growth, we packed stone around the edges and between the steps.


We wanted to make the path look more defined so we continued the stones all the way to the beginning of the garden.


Excuse the leaves, Joe lives to use his new weed whacker. 😚


We're making progress! Till next time..

Xo
Amanda & Joe


Kitchen Before and After

Friday, February 14, 2014

We're both so happy and proud to share this post. A lot of hard work, thought and patience went into this part of our house, the kitchen. We both love to cook and so for us the lay out of the kitchen was super important. We worked with different designers and went through quite a few lay out options till we found the right one for us.


It took around three months from beginning to end - felt like an eternity but all in all it was worth it. We did what we could ourselves, including painting, back splash etc. Despite the exhaustion we couldn't love it more and we're so happy to share it! 

The Projects:
Removing the old cabinets (and finding them a new home)
Opening the wall
New Floors 
Painting
Kitchen Cabinets
Choosing Hardware


The Details:


Do you have an awesome kitchen remodel you've done? Share it with us!

Furniture Makeover: The Bar

Thursday, October 31, 2013

When it came time to move we started planning what furniture we would keep and what we would toss, since we would be merging all of our things. One of the pieces we knew we didn't want to get rid of was an old, and rather large, china hutch Joe has had for ages. So we decided with a little imagination it would our new bar! Every house needs a good bar, right?
While a few finishing touches are needed we just couldn't wait to share how excited we are about it.
First of all, sorry about this picture, I didn't realize until I sat down to put this together that I had forgotten in the chaos of the move to take a before picture. I did find it in the background of a picture taken during the making of our Wine Cork Table (link) so voila!


First we took apart the whole unit and removed the doors, then it was time to sand.

and sand some more.


Once we had taken off the doors on the top portion of the bar we removed the chicken wire looking front.

After all the sanding was done it took 6 cans of BIN to prime both the top and bottom portions of the bar. After priming I used my beloved paint sprayer and some high gloss white paint to finish it off.

Initially when we start this makeover we planned on picking new hardware, but plans changed when we realized there is no longer hardware made that would fit the existing holes on the drawers and doors. We didn't want to put more wholes in or ruin the existing look and lines of such a cool piece of furniture so I thought I'd try using some left over chrome spray paint and see what it looked like.

Because of the amazing detail in all the pulls and handles the chrome turned out to be a perfect option, we both actually gasped as we painted it, because it looked THAT much better.

Pretty amazing.

Another.. because I'm obsessed.


Once everything had dried we started moving it in, and putting it back together.

We decided to mount the top portion instead of stacking it like it was before so we would have a space to make drinks on.
After securing the top to the wall we glued mirror panels to the outter sections. 

Next, we bought some inexpensive corbels at home depot and painted them to match, 
we wanted to go for a custom wall unit look instead of two separate pieces.

In this picture from our Bar Serving Tray Project post you can see one of the corbels after it was hung, we left just enough space to make delicious cocktails :)


We're still finishing up the doors but in the mean time, why not start stocking! 
(PS Totally in love with the 'BAR' sign - post coming soon!)