Showing posts with label bathroom. Show all posts

Master Bathroom Update: Lighting

Friday, August 26, 2016

The master bathroom has come such a long way since we moved in, and so much has changed. I think we can all agree lighting is crucial in any room, especially the bathroom, so we wanted to create different lighting options and not just one fixed on/off setting. 

Just a little throw back to what our bathroom used to be.

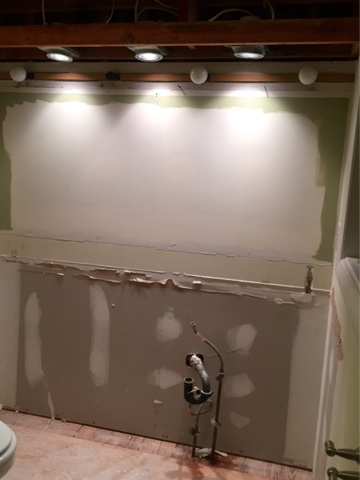
Once we opened up the soffit we saw an opportunity to use part of what was there. To create a little less destruction, we moved the lights from the bottom and secured them to the board that was previously the top of the soffit. We also patched the wall where the 'Hollywood' light had been but kept the wires and put them into a new junction box. 

Then we took a board and traced out the three lights that we had moved upward. 


Once we were sure that would fit, we took the board out to stain it. We stained the bottom board the same color as a piece of reclaimed barn wood we had in the garage (because doesn't everyone have a stash of reclaimed barn wood?). 

Once all the boards were dry, we secured the underneath panel over the lights, with a nail gun. Then secured the reclaimed barn wood to the front, with wood screws and the impact driver, to act as a panel. It's covering the wires up top, and giving the appearance of a wood beam.

It actually came out a lot better than we imagined, it's up high enough now the room feels much taller, and the reclaimed wood warms up an otherwise gray, cool feeling space. 

Much better!

The lights in the soffit really help to brighten the space as well, great for beauty time.


We do need to replace the light in the shower, but for the time being, it works!

After our first shipment arrived damaged and had to be returned, we waited THREE MONTHS for this awesome mirror - totally worth the wait. Its a touch LED mirror with a blue setting (we found out it actually acts as a black light) and a white setting that you can see set into the mirror. The lights can be on individually or together. It looks very over budget - but surprisingly wasn't!


The Master Bath: Stop.. Tile Time

Monday, February 15, 2016

Even though the master bathroom project took longer than expected and hit a few bumps along the way, I think this has been one of our favorite projects to watch take shape. Most of the renovating we've done has been on our own, and we haven't had many outside contractors come in to do work. Seeing something everyday ruins the 'OH MY' moment you get when you come home to find a fully tiled AMAZING space. 
Each of us gets a few 'must haves' on each project we do, Joe's was a pebble floor. He got his way, and I think we both love it equally.


One of my 'must haves' was the niche - and being only slightly difficult it had to be a custom size, low enough for my foot to rest when shaving (the ladies will under stand) and the tile had to be shiny. We met an adorable consultant at the tile store who told us 'the niche tile was the jewels of the necklace'.


Stay tuned for all the finishing touches!


The Master Bath: Prepping for The New Bathroom

Friday, January 22, 2016

Master bath update time! Demo was way smoother and easier than expected. We were both in shock that the floor tiles were laid directly on the sub floor, and barely attached at that. But next it was time to prep. This step was a lot more labor intensive than we originally realized, however, it's probably the most important part of the whole process so we made sure to get it right!
Once the tub/shower combo was gone we had to remove some odd studs in the wall and make sure the framing was secure. We also had to cut plywood to act as the base for our shower pan and water proofing. 

Because the floor joists ran through the middle of the shower, our plan to center the drain had to be scrapped. We did move the drain out a little bit to be under the rain shower, but this meant we had to have a custom shower pan built - bye $400. Oh well. 


Remember that weird soffit from the demo post? We had to sawzall that bad boy out. The opening leads into one of the master closets - weird right?!

So we bought sheet rock and got to work! **Side note: we've used quite a bit of sheet rock tape in our day but this stuff was amazing - self adhesive and mold resistant, it's perfect for bathrooms. 

Then it was time to mud and sand. And mud and sand. And mud and sand some more! The walls we're pretty uneven, and had clearly had some bad patch jobs from renovations past. Once that was done, our amazing tile guy got to work waterproofing the walls. 

Let the tiling begin!


D-Day: Master Bathroom Demo!

Wednesday, December 2, 2015

We've been in our new house for a few weeks now and there's one thing I've been counting down the days to do - demo the master bath! We couldn't wait to say goodbye to this weird bathroom and all its soffit filled glory!

Oh those broad way lights. 


What even is that in the shower?!


A little demo is good for the soul, and a major stress reliever.. Until you realized you're down a bathroom. Now the fun can begin!


The Powder Room Makeover

Tuesday, April 1, 2014

Hello all! We are so excited to share another room that's near completion! Our powder room is located right near the front door and across from our kitchen, because it's one of the first things you come across when you walk in, and is going to be used by most people who come over, we wanted to love it.  The walls when we moved in we're a little beat up, the vanity was bad 80's laminate and the sink had seen better days - so out it went! We got to work fixing and painting the walls, then replacing the vanity. The countertop was actually a small remnant we found in a pile outside the shop we ordered our kitchen countertops from. If you're doing over smaller vanities that is definitely the best way to go, you can get a great quality stone for pretty cheap!

With the new vanity, counter top and sink in we realized it was a little blah. What better way to add some "wow" than with great backsplash? We picked up some inexpensive sheets from Home Depot and got to work.


Then we grabbed a frame from Ikea, it was the perfect size and simple style we were looking for the mirror to have.


We added a hand towel ring so guests would have a way to dry their hands. We also did a little silver leafing project to create the W & C (water closet), they gave that awkward wall a purpose!

We LOVE the sink in this space. It's the smaller, square version of our two upstairs sinks and it was super affordable! (Our Powder Room Sink )


We originally ordered this adorable hand towel for the kitchen but since we got three for $27 (such a steal) we put one in the powder room too. We found them on Etsy, you can choose your letter, and colors - so awesome! Order some for your house >> HERE

We both really love how far the powder room has come and the whole project was surprisingly inexpensive (we like that)! But since our renovating is never REALLY done were in the midst of putting in new trim, and debating a new tile floor.. so the saga continues. 

The Goods