
This project has been a long time coming! During the kitchen reno we decided to rip out the bathroom vanities and replace them with new ones that would match our pretty white cabinets! So since we moved in at the beginning of August we have had gorgeous new bathroom vanities but been without countertops in both upstairs baths (love brushing my teeth in the shower), the time has finally come to get 'er done!
After measuring the size of the new vanities and how large we wanted our countertops to be Joe built the mold. We were lucky enough that we were also removing my moms old countertops at the time and the material was perfect. Using a table saw, screws and silicone caulk Joe made the molds to pour the concrete into.

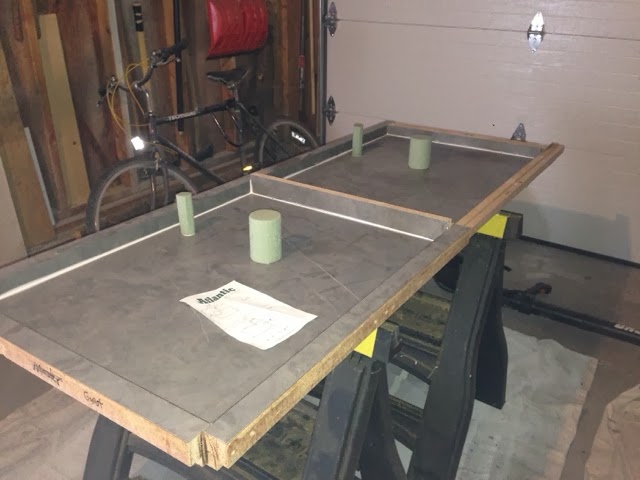
Once the molds were made we headed to the local craft store and picked up some heavy styrofoam (in the plant assortment isle) and Joe cut it to fit the opening for the faucet and sink drain.

Once the mold was ready we used a bucket, and following the concrete bag instructions mixed it all together. *Tip: we used a palm sander, running it along the bottom of the mold, just after the concrete was poured, to help release any air bubbles.


Once the concrete had cured for a few days we removed the screws and flipped the countertops over to paint the top!

We used three coats, letting it dry a day in between (don't worry about the ugly spot, the sinks covering it!). After the paint had dried we poured the epoxy sealer over top. You can usually find this project at a home improvement store. Random side note: I used a similar poxy in a laundry room project I'll be posting soon, and it's pretty cool!

After letting that dry it was time to move the countertops into place!
Both counter tops aren't quite done yet we still have our tile backsplash to put up and sink to install but so far so good!
Update: Nearly complete guest bath and all we need now is a snazzy mirror! AND we decided to try out a second kind of countertop finish >> Check It Out!


0 comments:
Post a Comment