Showing posts with label tile. Show all posts

Kitchen: Backsplash & Pulls

Wednesday, March 8, 2017

Hello all! Sorry for our absence.. the holidays got away from us! We had a great time hosting friends and family and we luckily managed to get the kitchen pretty much done (someday we will be able to say totally done - right?). Anyway, back to the kitchen.. after much termoil, staring, texting photos to friends for opinions, we picked a tile. Then.. we put it up! Woooo! 


This was our first tiling experience using individual tiles and not sheets. We thought we were going to hate it, but it actually ended up being a lot easier than expected. Having the right spacers, and enough of them is essential - but we'll get to that later!

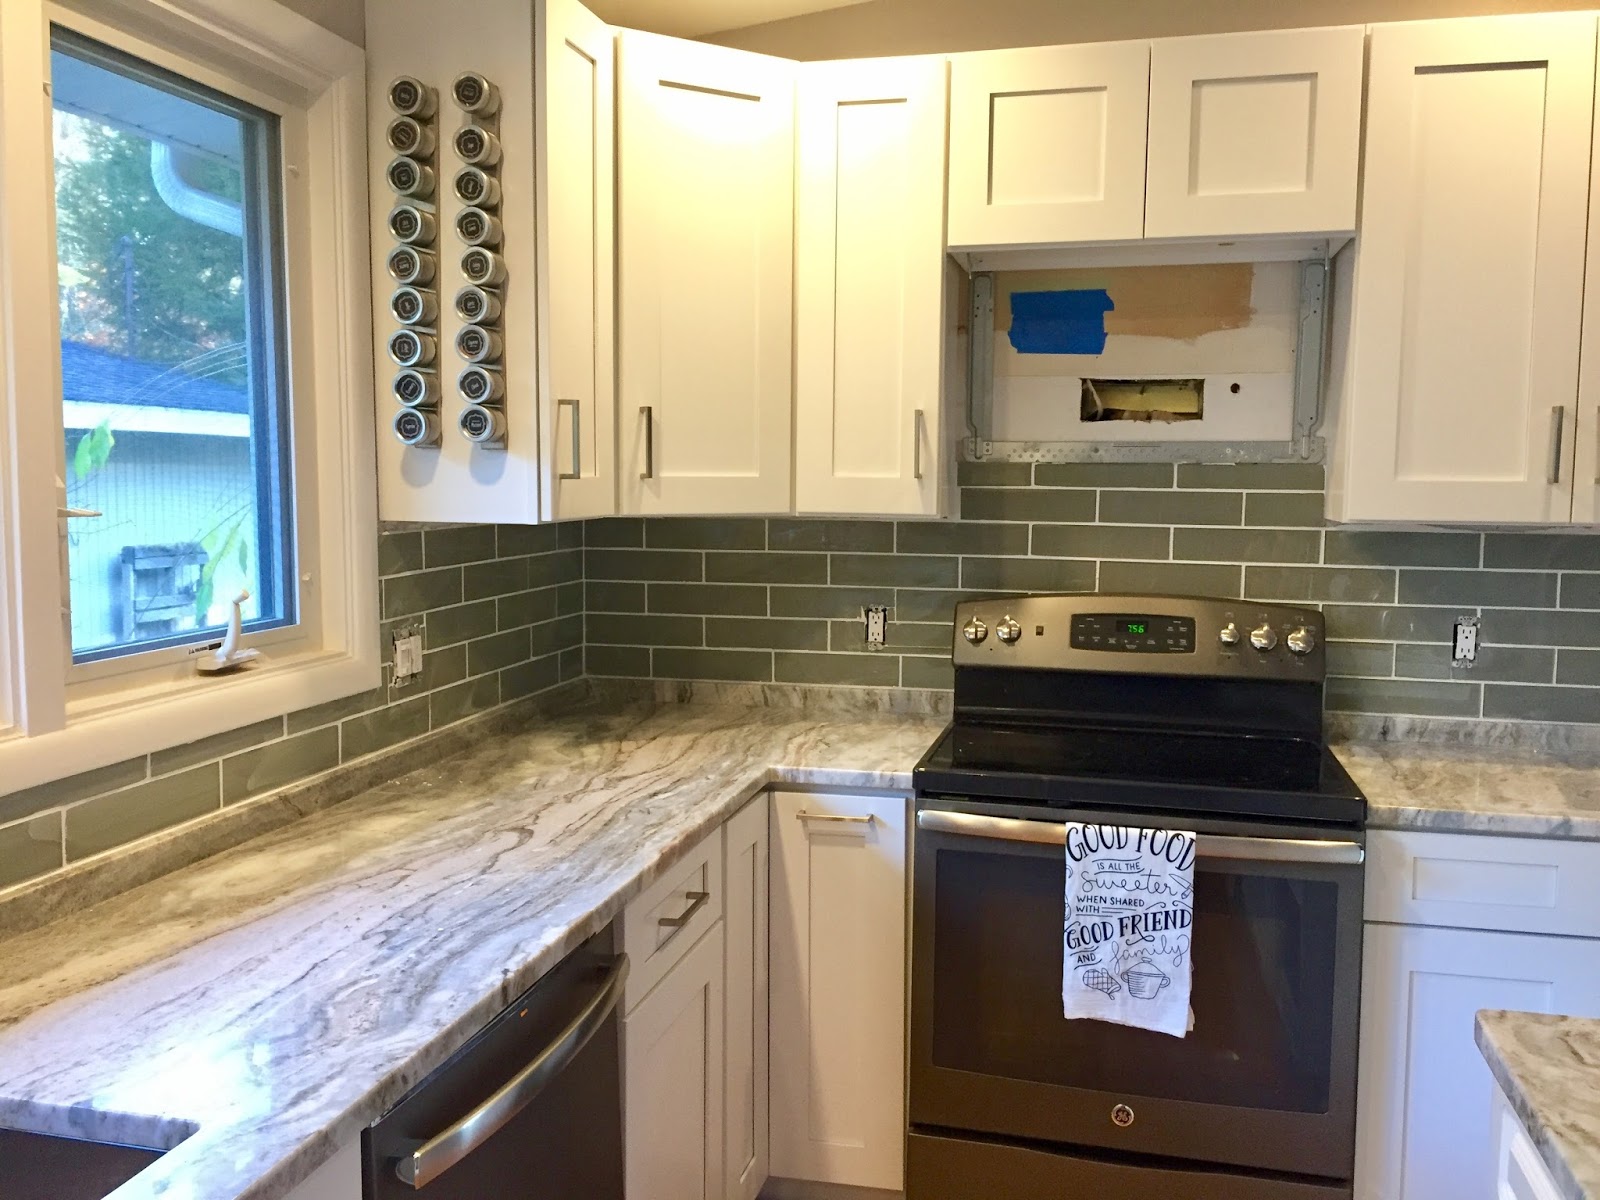
Besides our indecision on the which tile to go for, we had complications with the plugs in the backsplash, as well as the switch for the garbage disposal, having no where to go now that we had added the countertop 1.5in backsplash (not to mention we also now had level cabinets and counter tops, our original kitchen had a significant slope to the right). After much debate we decided to have our amazing countertop team come out and drill a hole just above the sink where our awesome new disposal button would be! Once the electrician wired it in, and closed off the other plug we didn't need we were ready to rock and roll (two weeks behind schedule, and one week before Thanksgiving).


Oh and the sink went in - SO PRETYY!! We chose the same faucet, and a similar sink to our last renovation.


We started in the far corner by the fridge, and worked our way across in sections. (Side note, our tiles were ones we found at Lowe's, we love them now but the process of finding enough boxes of them for this project required trips to a few stores.)


These spacers were our BEST FRIENDS for this project.  We actually ended up using two sizes, one went along the bottom of the countertop backsplash, and the other was between the intersections of all the tiles.


  As we started to work our way across, the other awesome new tool we picked up, seriously came in handy - we bought a wet saw! It turned out to be a life saver, and a very good purchase design. The saw came with a diamond blade, which ended up being great for our master bathroom project, for this project we had to pick up a diamond blade for glass.


We kept working our way from one end of the kitchen to the next, being careful to only use the amount of mortar we needed so that the tiles would dry and not be too heavy.

We used our tile sponge to clean up the tiles, and remove the spacers - once the mortar had dried.


Since we had chosen a glass tile, we wanted to invest in new tile floats, to make sure we didn't scratch the tiles. We also picked up a grout additive, it's meant to keep the grout from staining, and in a kitchen that's essential!


Grouting this project required a good bit of patience. There is a lot of tile surface area so just spreading the grout with the float isn't exactly the easiest thing to do. We had to get a little creative and try to just apply it to the actual lines. Never the less, we figured it out, but these tiles did require lots of cleaning, we got a serious arm work out.


You can see in these pictures, it's still a little hazy - time to clean the sponge and go again!


In the midst of putting up the backsplash tile our pulls arrived and we started installing those as well! We went with two sizes, one size for the doors/drawers and a larger size for the pantry (oooo aahhh).


It's beginning to look a lot like a real kitchen! More to come!

Amanda & Joe


The Master Bath: Stop.. Tile Time

Monday, February 15, 2016

Even though the master bathroom project took longer than expected and hit a few bumps along the way, I think this has been one of our favorite projects to watch take shape. Most of the renovating we've done has been on our own, and we haven't had many outside contractors come in to do work. Seeing something everyday ruins the 'OH MY' moment you get when you come home to find a fully tiled AMAZING space. 
Each of us gets a few 'must haves' on each project we do, Joe's was a pebble floor. He got his way, and I think we both love it equally.


One of my 'must haves' was the niche - and being only slightly difficult it had to be a custom size, low enough for my foot to rest when shaving (the ladies will under stand) and the tile had to be shiny. We met an adorable consultant at the tile store who told us 'the niche tile was the jewels of the necklace'.


Stay tuned for all the finishing touches!


The Powder Room Makeover

Tuesday, April 1, 2014

Hello all! We are so excited to share another room that's near completion! Our powder room is located right near the front door and across from our kitchen, because it's one of the first things you come across when you walk in, and is going to be used by most people who come over, we wanted to love it.  The walls when we moved in we're a little beat up, the vanity was bad 80's laminate and the sink had seen better days - so out it went! We got to work fixing and painting the walls, then replacing the vanity. The countertop was actually a small remnant we found in a pile outside the shop we ordered our kitchen countertops from. If you're doing over smaller vanities that is definitely the best way to go, you can get a great quality stone for pretty cheap!

With the new vanity, counter top and sink in we realized it was a little blah. What better way to add some "wow" than with great backsplash? We picked up some inexpensive sheets from Home Depot and got to work.


Then we grabbed a frame from Ikea, it was the perfect size and simple style we were looking for the mirror to have.


We added a hand towel ring so guests would have a way to dry their hands. We also did a little silver leafing project to create the W & C (water closet), they gave that awkward wall a purpose!

We LOVE the sink in this space. It's the smaller, square version of our two upstairs sinks and it was super affordable! (Our Powder Room Sink )


We originally ordered this adorable hand towel for the kitchen but since we got three for $27 (such a steal) we put one in the powder room too. We found them on Etsy, you can choose your letter, and colors - so awesome! Order some for your house >> HERE

We both really love how far the powder room has come and the whole project was surprisingly inexpensive (we like that)! But since our renovating is never REALLY done were in the midst of putting in new trim, and debating a new tile floor.. so the saga continues. 

The Goods


DIY: Mosaic Tile Bedroom Mirror

Monday, March 17, 2014


With all the home improvement projects we've been doing our master bedroom has gotten the short end of the stick. It's been pretty neglected in comparison to the rest of the house. Besides our bed, dresser, and two mirrors there's not a whole lot going on. One day while I was at work my better half surprised me by putting up a long mirror up on the wall next to my closet (yes, MY closet, separate closets and separate bathrooms keep the love alive when one of you is a tad OCD). I loved the mirror placement it's perfect for a million wardrobe changes - but it looked a little plain. Instead of going out and buying a frame we thought it would be fun and a little more exciting to create a tile border. 

  
First we laid down some paper so we didn't ruin the floors. 

Next we picked out some inexpensive sheets of tile. 

Once we decided the width of the border we cut the sheets of tile into strips using a razor blade. 

After cutting the strips we cut and laid out the entire perimeter of the mirror on the ground. 

Next it was time to tape! We taped the outter edge of where the tile would be as well as on the edge of the mirror to prevent scratches. 

Then it was time to mix the mortar!

And apply it to the wall, section by section. 

Then we used a tile trellis to create a groove pattern. 


After that it was time to start applying the tile strips. 

We continued working our way around the mirror pressing the strips firmly in place, and using a level to make sure all sides were straight. 


Once that was done it was time to remove the tape. 

After letting the mortar set for 24 hours, it was time to grout. 

We mixed our grout and then retaped the interior of the mirror edges. 

Using a tile float we worked our way around the edges smoothing the grout into all the spaces (and trying not to make a huge mess). 

Once that was all done we removed the tape. Then we used the damp sponge to lightly wipe away any excess grout. 

After a few hours we sealed the edges of the mirror with caulk. 

Once everything had dried we used a sponge and tile cleaner to remove any left over haze on the tile, and our trusty Windex Touch Up to clean up the mirror. 

We both really love the end result! 

Have you ever done a project like this one? How did it turn out?